Layers
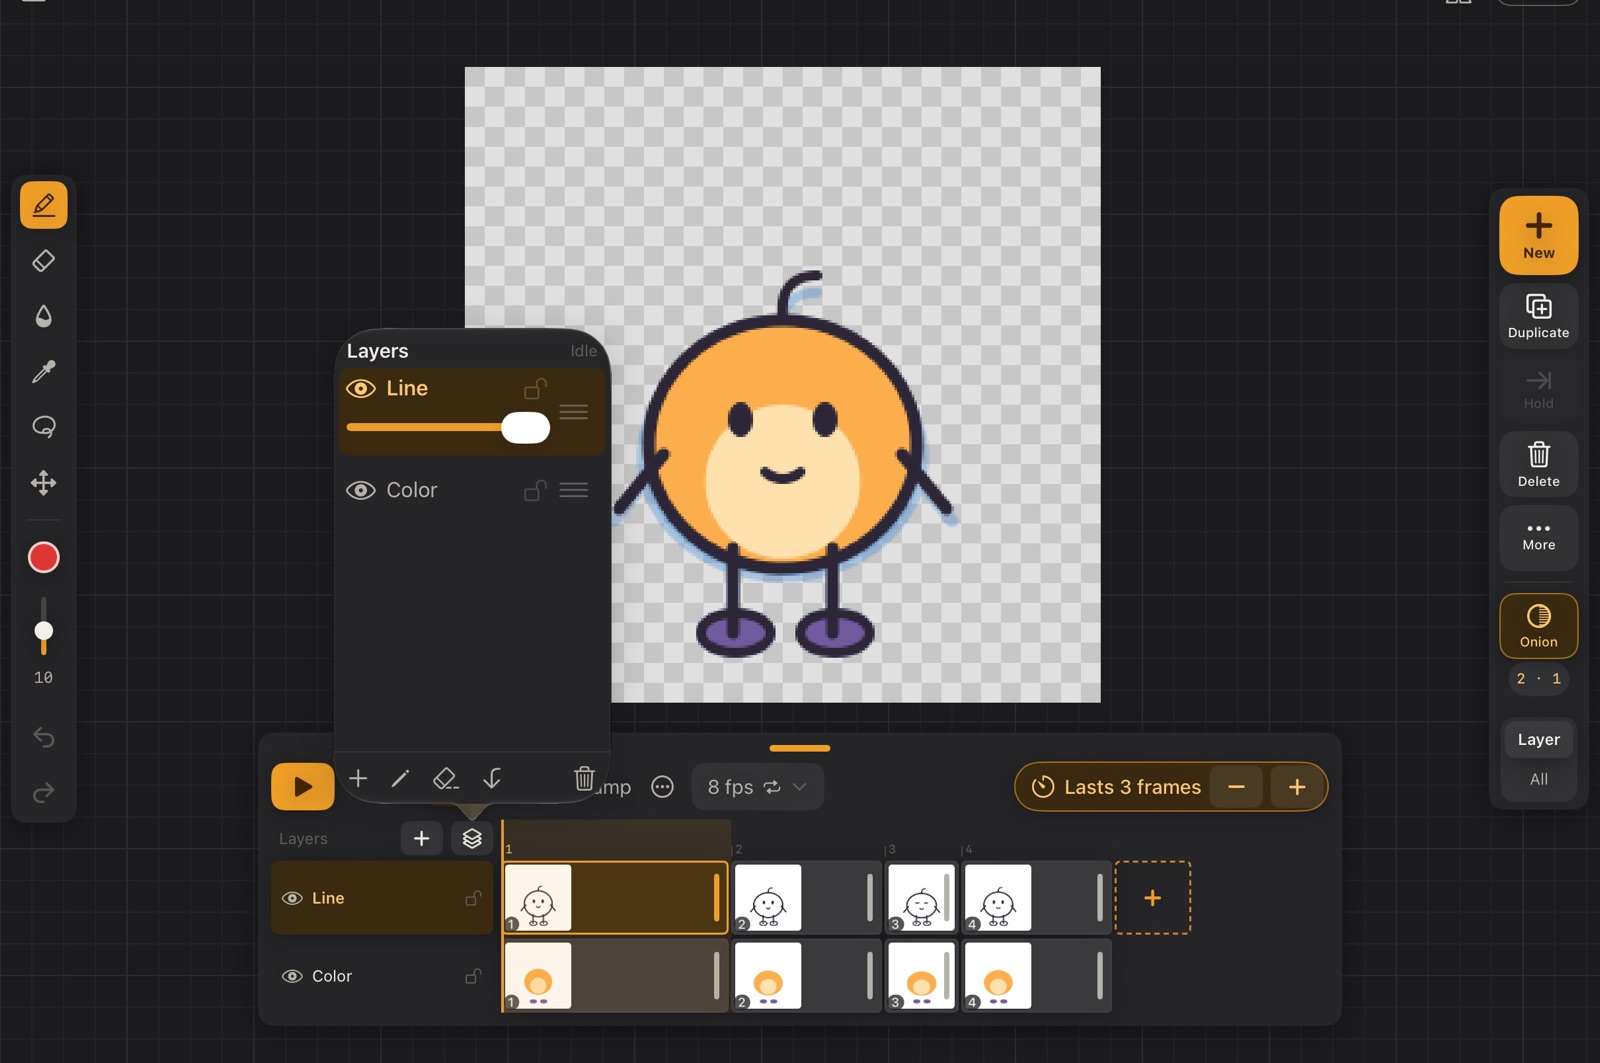
Each clip has a stack of layers, top to bottom in the timeline. New clips start with Line on top and Color under it, the usual way to animate: lines first, colour after.
Every layer has its own drawings and its own timing. Line can change every frame while Color holds the same fill for three, or a background layer can stay still for the whole clip.
In the timeline
On the left of each row:
- Eye: show or hide the layer. Hidden layers aren't exported (Calco warns you before exporting).
- Name: tap to draw on that layer. It's highlighted in orange.
- Lock: protects the layer from the pencil, eraser, fill and selections.
Long-press the name for Rename…, Opacity…, Mask to layer below, Guide only (not exported), Flip, Move up, Move down and Delete layer….
Flip mirrors the layer's drawing at the playhead, horizontally or vertically (a head turned to look the other way), or every drawing of the layer in the clip at once. Strokes stay strokes, sharp and editable; one undo step.
The dots button above the layer names makes the timeline compact: thin rows with a dot for each drawing (hollow while it's blank) and a line through the frames that hold it, so many layers and frames fit at once. Tap it again for the previews. Pixel-art projects show it compact, the rest with previews.
The layers panel
The stack icon over the layer names opens the full panel: drag the handle to reorder, an opacity slider for the selected layer, and buttons to add, rename, clear, mask and delete.
New layer
The + over the layer names (New layer) offers three kinds of layer, and two ways to bring in an image:
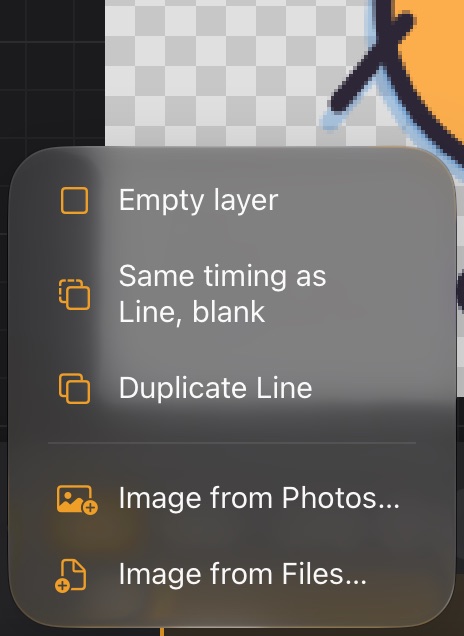
- Empty layer: a blank layer above the current one.
- Same timing as Line, blank: a layer under the current one with the same drawings and holds, all empty. Perfect for a colour pass: one empty drawing waiting under each line drawing.
- Duplicate Line: a copy with all its drawings.
- Image from Files… / Image from Photos…: a reference image to draw over.
- Sequence as guide…: one image per frame, to trace a motion made somewhere else.
Reference images
Import a sketch, a model sheet or a frame of video reference and trace over it. New layer → Image from Photos… (or Image from Files…) adds it as a layer called Reference:
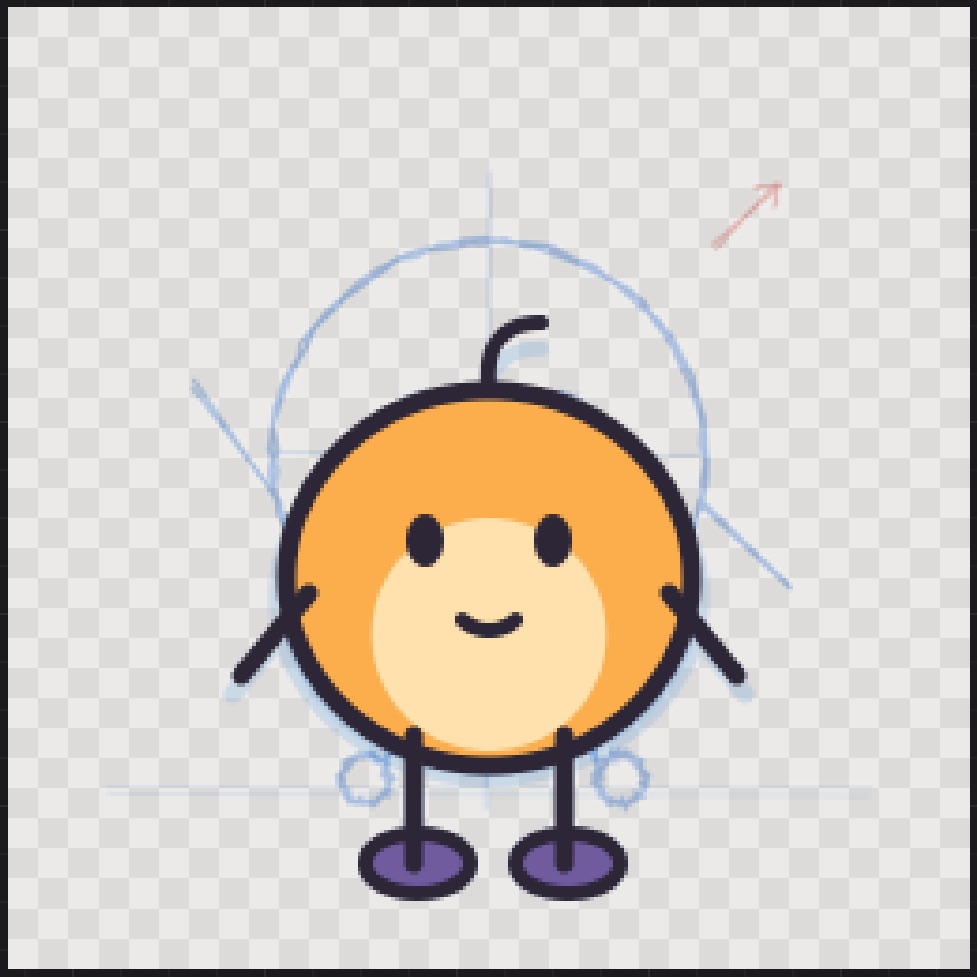
- It goes under every layer, fitted to the canvas without stretching, and shows through the whole clip.
- It's at 40 % opacity and locked, so the pencil, eraser and fill never touch it: you keep drawing on the layer you were on.
- It's a guide (the photo icon next to its name): you see it in the editor, but it's never exported, and the fill doesn't use it as an outline.
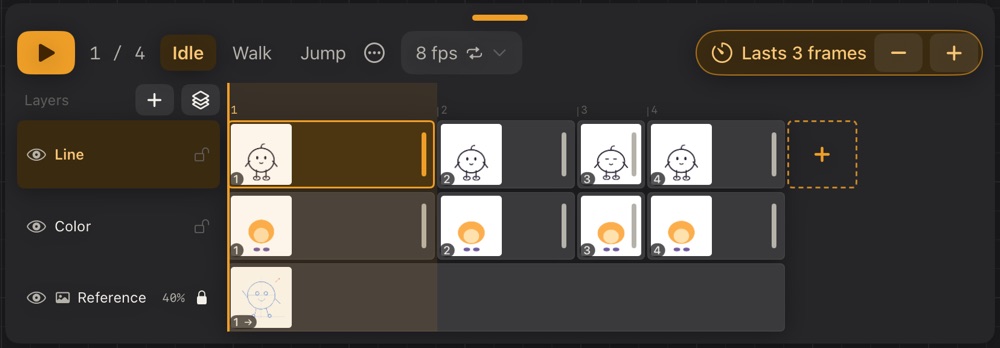
To change it, tap 40% for its opacity or the lock to unlock it. Long-press the name and choose Export this layer to make it part of the sprite, or Guide only (not exported) to turn any layer into a guide, for example a layer of rough construction lines.
Mask to layer below
A masked layer only shows where the layer under it has paint, like a clipping mask. Put a Shadows layer above Color, mask it, and paint freely: the shadows never spill outside the colour. Several masked layers in a row share the same base. Masked layers export flattened, exactly as you see them.
Colour and line, step by step
- Draw the animation on Line.
- New layer → Same timing as Line, blank creates a colour layer under it.
- Select it and use the fill: the lines on Line are the outline, and the paint goes on the colour layer.