Drawing tools

The tools live in the rail on the left. A small triangle in a button's corner means it holds more than one tool: touch and hold it to pick another. The rail remembers the last one you used in each slot.
| Slot | Tools |
|---|---|
| Pencil | Pencil, spray |
| Eraser | Eraser |
| Bucket | Paint bucket, gradient |
| Eyedropper | Eyedropper |
| Shapes | Line, curve, rectangle, ellipse, contour, polygon, text (see Text and slices) |
| Selection | Rectangular and elliptical marquee, lasso, magic wand |
| Move | Move, slice |
Below them are symmetry and the scripts menu ({ }).
At the bottom of the rail are two sliders, brush size above opacity, like Procreate's: drag them up or down and the value shows beside them. Size is dimmed for tools without a brush or with a custom brush.
Undo and redo are in the top bar.
Tool options
The active tool's options sit in the middle of the top bar. When a tool has more options than fit, the bar scrolls sideways. Every number (brush size, opacity, tolerance…) opens a panel with common values, a slider, large −/+ buttons and a field to type it.
Pencil and brush
- Size from 1 to 32 px, and the shape: square, round or line (at any angle, in 15° steps).
[and]change the size. - Pixel-perfect cleans the corners of 1 px strokes. It's off by default and the choice is remembered.
- Spray (⇧S) scatters pixels inside a circle; set its width and speed.
Custom brush
Select part of the drawing and choose New brush from selection (⌘B) from the Edit menu, or touch and hold the pencil in the rail:
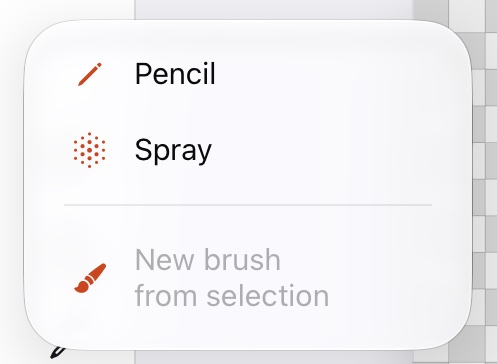
The brush is made from the selected pixels of the active layer, and OpenPixel switches to the pencil to paint with it. Tap and you stamp it; drag and you leave a trail. It stays while you change frame or layer, so you can stamp the same hat on every frame of a walk.
- Its thumbnail appears next to the square, round and line shapes: tap it to go back to it.
- Use color paints only its silhouette in the primary color instead of its own colors.
- The eraser uses it too.
Eraser, bucket and gradient
- The eraser clears to transparent. On a background layer it paints the secondary color instead.
- The paint bucket fills contiguous pixels or every pixel of that color (global), with a tolerance. Diagonals lets the fill spread through corners, and All layers finds the area from every visible layer while painting only the active one. With a grid on, it can stop at the grid lines.
- The gradient (⇧G) fills the area the bucket would fill, blending the primary into the secondary color. Drag across the area to set its direction. Linear or radial, smooth or with 2×2, 4×4 or 8×8 Bayer dithering, or a dithering matrix from an extension.
Shapes
- Line (L) and curve (⇧L): for the curve, drag the line, then drag twice to bend each end.
- Rectangle (U) and ellipse (⇧U), filled or outlined, previewed while you drag. Rectangles can have rounded corners.
- Contour (D): draw an outline and it fills when you lift.
- Polygon (⇧D): tap each corner, then tap the first one (or Done) to close it.
Control points and corners are marked on the canvas while you build a shape.
While you drag a line, rectangle, ellipse or gradient, a label next to it shows its size in pixels, like 12 × 8. A line also shows how many pixels long it is and its angle: 12 × 8 · 12 px · 34°. The label sits by the corner where you started, so your finger or Pencil doesn't cover it. You can turn it off in Preferences.
Inks and opacity
As in Aseprite, the ink decides how a stroke mixes with what's there:
| Ink | What it does |
|---|---|
| Simple | Paints the color. |
| Alpha compositing | Blends semi-transparent colors over what's there. |
| Copy alpha + color | Replaces the pixel, transparency included. |
| Lock alpha | Paints only over pixels that are already drawn. |
| Shading | Each pass moves drawn pixels to the next or previous palette color. |
The tool's opacity applies once per stroke, so going over the same spot doesn't build up. Apple Pencil pressure can change the brush size, the opacity or both.
Eyedropper
The eyedropper (I) picks from the whole image or from the active layer only. You don't need to switch to it: touch and hold the canvas with a finger while drawing with the Pencil, or hold ⌥ and tap with a keyboard. The picked color shows at the top of the canvas, filling the notice with its hex value.
Symmetry
The symmetry button in the rail mirrors what you draw, as in Aseprite: horizontal, vertical or both.
- Tap it to turn symmetry on or off; touch and hold it to choose the axes or center them. While it's on, its corner says which axes: H, V or HV.
- Drag an axis by its handle (below or to the right of the sprite) to move it in half-pixel steps, so it can run between two pixels or through the middle of one.
Grid and tiled mode
- # in the top bar shows the pixel grid. Touch and hold it to set a grid of any cell size and offset, saved with the sprite. Snap to grid works as in Aseprite: the pencil, eraser and spray draw freely inside the cells (a brush as big as a cell fills whole cells), lines, curves and polygons go from corner to corner, rectangles and ellipses cover whole cells, marquees and slices take whole cells, and moves go cell by cell.
- Tiled mode (in the grid's menu: touch and hold #) shows the sprite repeated around itself, horizontally, vertically or both. Strokes, shapes and fills wrap across the edges, to make seamless textures. With tiled mode on, Canvas size fills the new area with the repetition, as in Aseprite: drag the right edge out and the drawing continues there. Make the repetition permanent (in the same menu, while tiled mode is on) turns it into the drawing: the canvas becomes ×2, ×3 or ×4 copies of itself along the tiled axes, with every layer and frame repeated (tilemaps reuse their tiles), in one undo step.